Abbie says: “I tie knots in thread all the time and I don’t even really think about it any more. I like to make granny knots best. But tying granny knots was hard at first because you have to make sure both knots match up and you don’t end up with lots of little knots all along your thread.”
Mrs. Brown says: “Tying knots in thread may seem a funny thing to post about, but it sure wouldn’t do to have your seams falling out of all your projects! So we figured we ought to remind you to get those knots in your threads first. My favorite is the wrap-around-your-finger method because I’m lazy. Abbie’s granny knots are much prettier than mine. And at this point she can probably make them as fast as I do with my ‘shortcut’ method!”
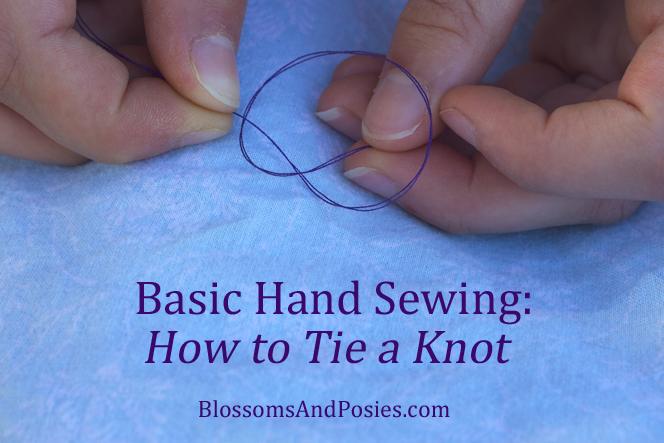
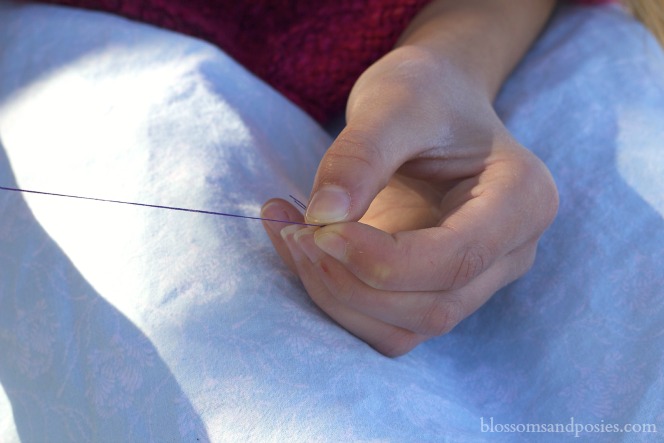
Preparing Your Needle and Thread
Abbie likes a very sturdy seam, so she almost always doubles her thread when she sews. Here’s how she gets her needle and thread ready:
- Cut a length of thread about three times the length of the seam you wish to sew.
- Thread your needle.
- Pull the thread so that the needle is in the center of the length of thread and the two ends meet.
From this point you can try any of the following methods of tying a knot in your thread:
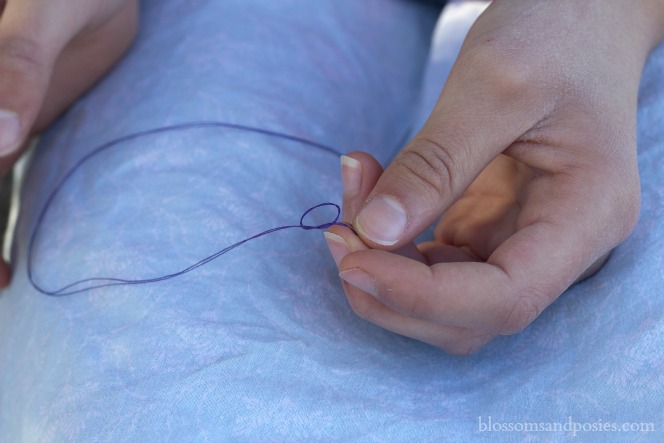
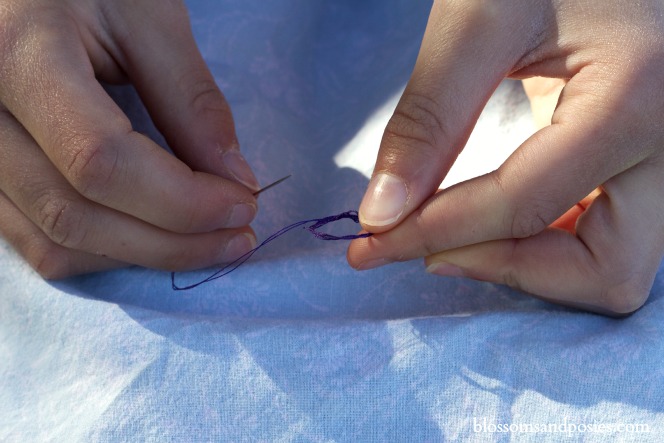
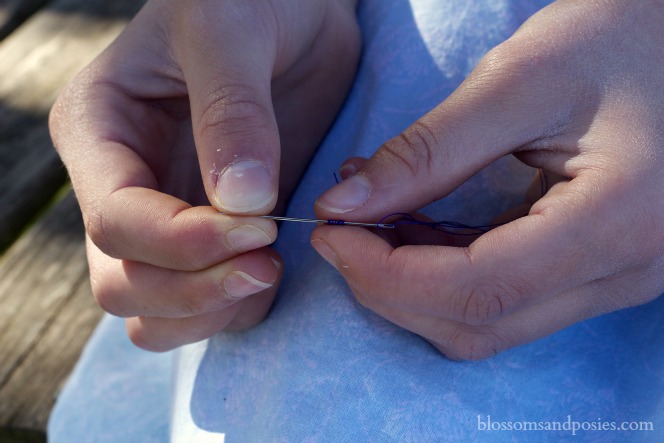
Granny Knot
Loop back the end of your thread and lay it over the main part of the thread.

Pull the end of the thread through the circle you have created.

Tighten the knot and repeat. With the second knot you need to tighten slowly and make sure it closes around the first knot (this is the part Abbie mentioned is a little hard at first).
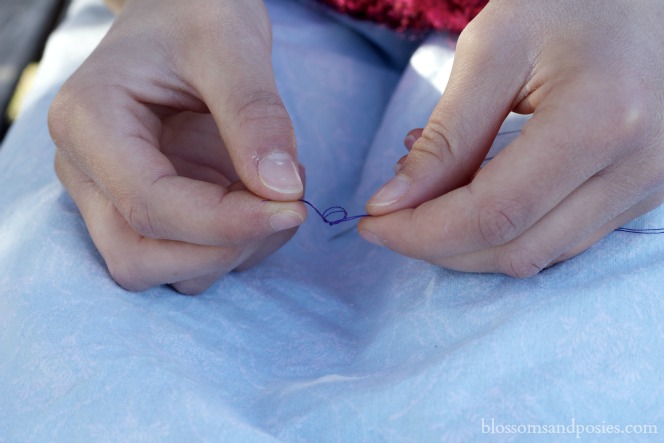
If the weave of the fabric you will use is very loose you might want to knot the thread three times but two is usually sufficient.
Wrap-Around-Your-Finger Knot
Take the end of the thread and pinch it between your thumb and forefinger. Wrap the thread two or three times around your forefinger, being sure to wrap over the end.
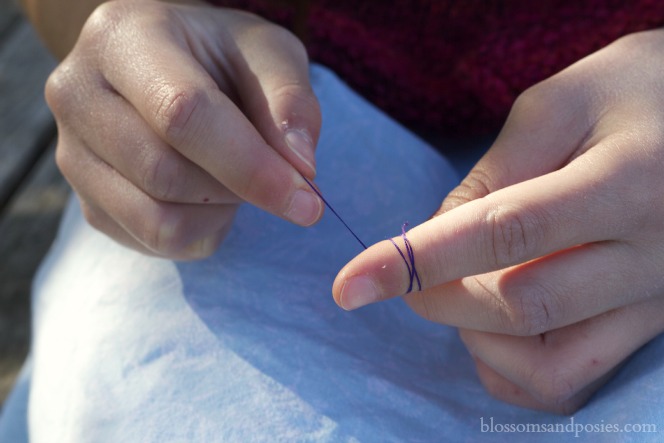
With the thumb and forefinger of your opposite hand roll the wrapped thread down and off your finger. You’ll have a “wreath” of thread.
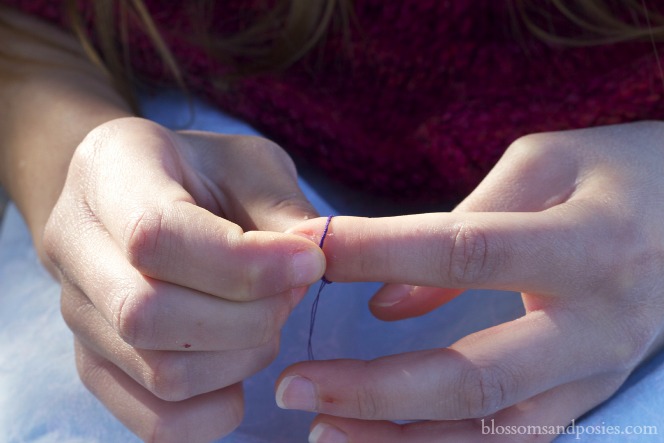
With the first hand pinch the wreath between your forefinger and thumb and pull away from the needle. The wreath should form a knot.
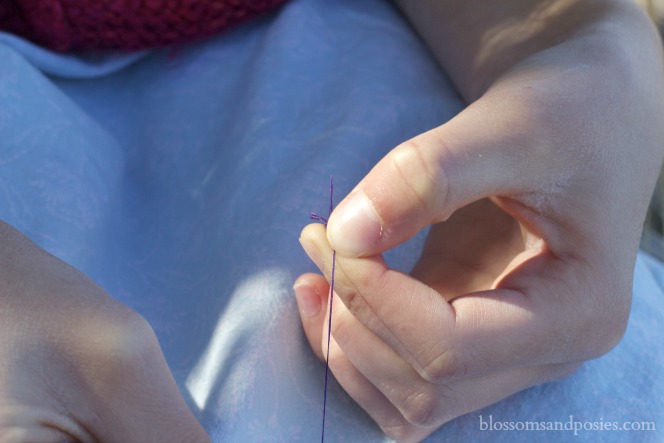
Wrap-Around-the-Needle Knot
Wrap the end of the thread around the needle 5 or 6 times.
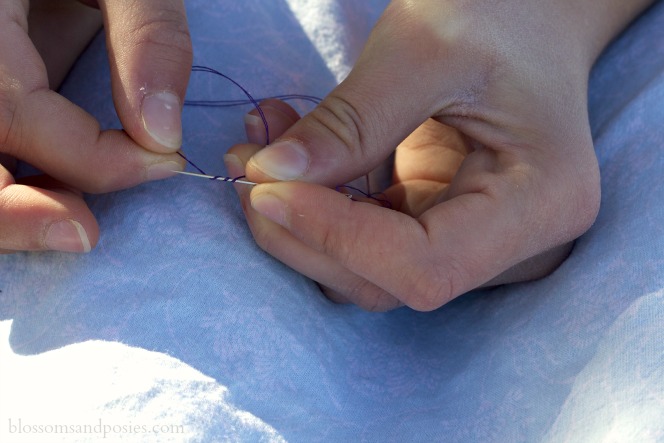
Pinch the loops on the needle between your forefinger and thumb, and pull them off the needle and down to the end of the thread, creating a knot.
There are even more ways than these to make knots in thread. What’s your favorite method?
I started sewing when I was younger than Abbie is now. The only method I learned was the quick wrap-around-the-finger method. I’m going to try the wrap-around-the needle method next time I need to sew something by hand. I bet it makes a very pretty and neat knot. Thanks for teaching me something new!
I use the granny knot when I sew buttons. That is all I know how to sew. :p
These methods are really nice!
Ellen
How funny, My grandmother taught me to tie knots by wrapping it around my finger and rolling it off…so I guess that’s my “granny knot.” 😉