A while back, as I was busy practicing the art of Doing Nothingness (a.k.a standing-around-not-being-very-productivisity), I randomly came up with the idea of making roses out of tissue paper.
I toyed with the idea a little, and pretty soon I had a small, red, easy to smash, tissue paper rose. In case you hadn’t noticed, I enjoy making long, silly, incomprehensible words and sentences, that include the extensive use of punctuation marks, predominantly the subtle, yet impactful character, the comma. 😉
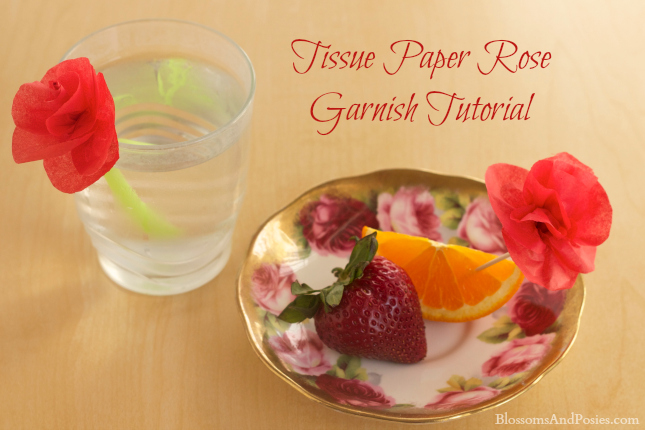
If you would like to learn how to make a miniscule, scarlet, readily disposable, that which is made from gift wrappings member of the genus Rosaceae (see second sentence for definition), I will show you how!
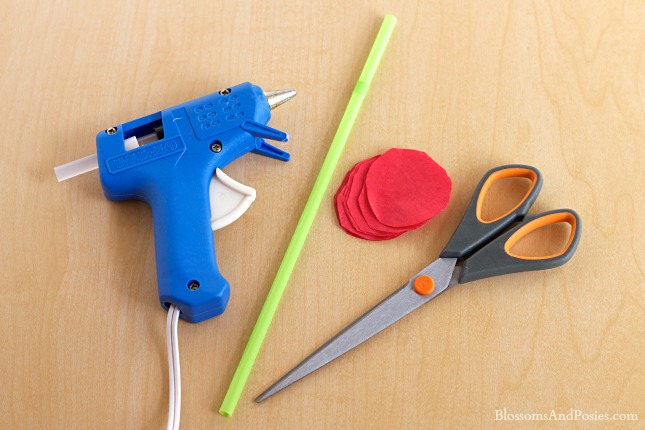
First you’ll need:
- a hot glue gun
- a pair of scissors
- a bunch of tissue paper circles
- a green straw or a toothpick
(I made the circles by folding tissue paper in half over and over until it made a square about 2 inches on each side. Then I cut the tissue paper into many different circles.)
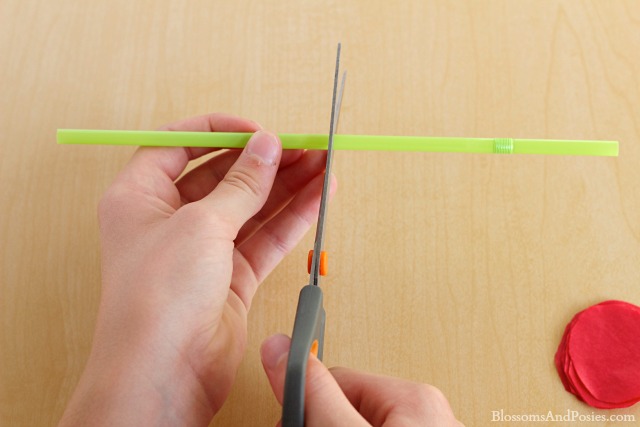
1) Cut the straw in half with your scissors.
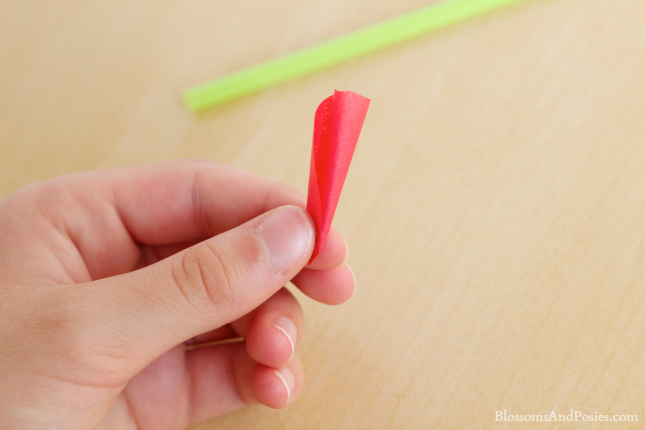
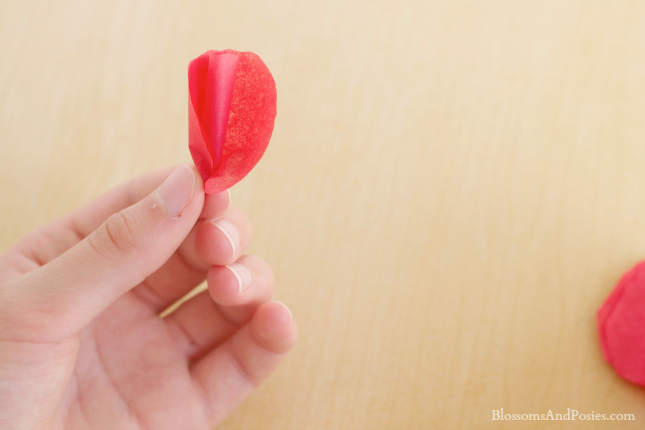
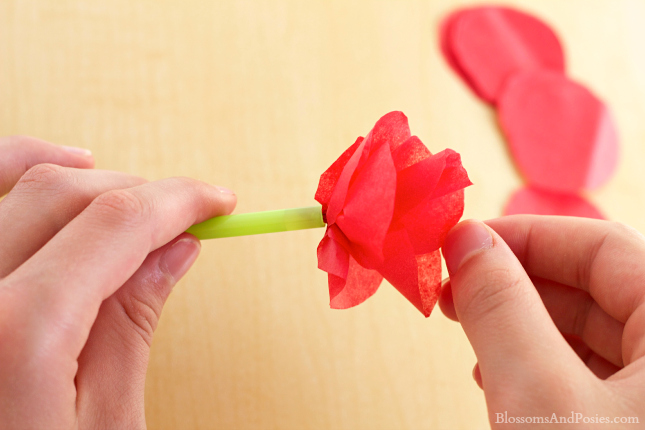
2) Take one tissue paper circle and roll it into a spiral so it resembles a scroll.
3) Wrap more circles, one by one, around the outside of the first circle, and pinch them together at the bottom as you add each one
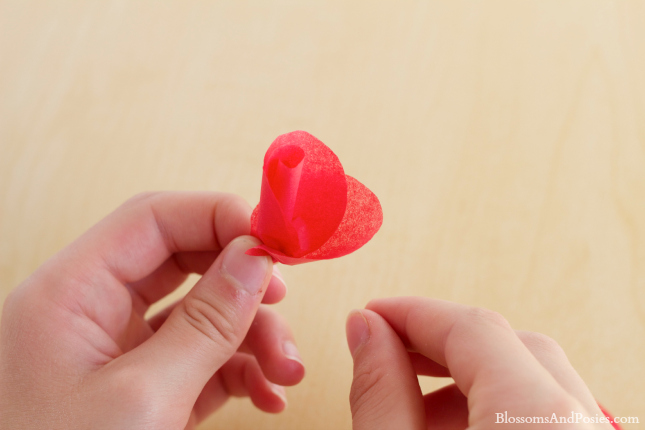
You can see that I attached each circle on a different side to make the petals go around.
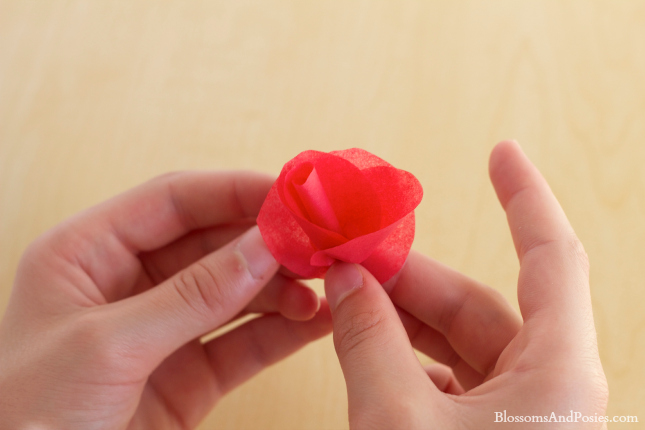
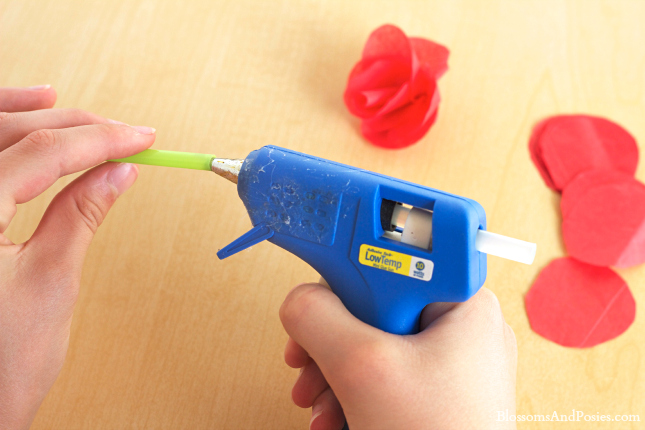
4) Once the rose is as large as you would like (I usually use 6 to 8 circles,) put glue inside the straw on the end in which you would like the rose to go. Put the rose into the straw by sticking the pinched end into the glue.
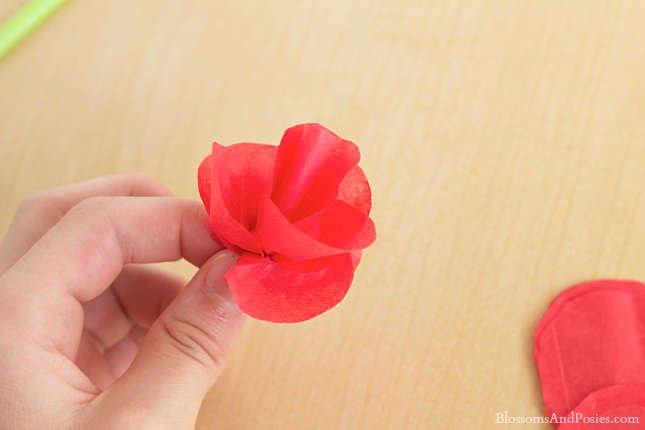
Let it sit for a little bit until it is dry. You have a tissue paper rose!
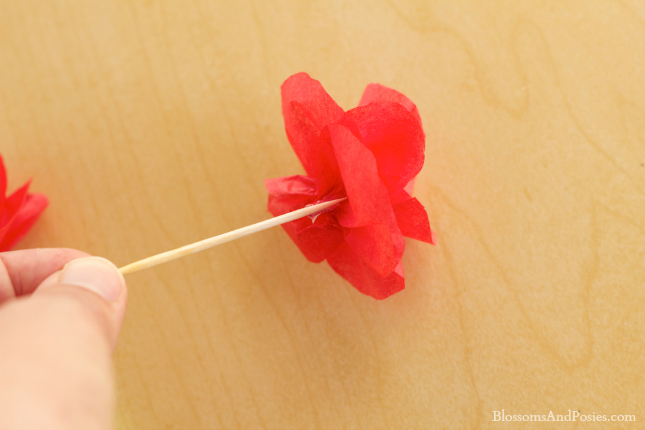
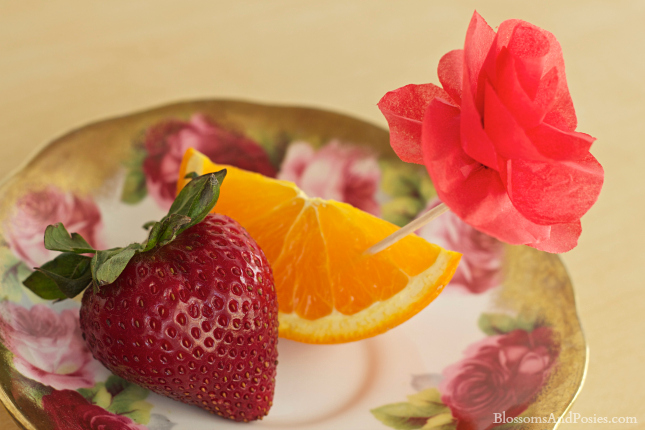
5) You can also glue your flower onto a toothpick. They are so cute as a garnish!
The great thing about a tissue paper rose is that you can make it any color you like! What is your favorite color?

- a hot glue gun
- a pair of scissors
- a bunch of tissue paper circles
- a green straw or a toothpick
- Cut the straw in half with your scissors.
- Take one tissue paper circle and roll it into a spiral so it resembles a scroll.
- Wrap more circles, one by one, around the outside of the first circle, attaching each circle on a different side to make the petals go around. Pinch them together at the bottom as you add each one
- Once the rose is as large as you would like (I usually use 6 to 8 circles,) put glue inside the straw on the end in which you would like the rose to go.
- You can also glue your flower onto a toothpick.
- Let it sit for a little bit until it is dry. You have a tissue paper rose!
Love,
Abbie
I really like this
Pretty!
Ellen
So cute! I will definitely be trying this out!